

There are a number of reasons why you would want to merge batches at some stage in the process. In NIMS it is easy to achieve and NIMS controls merging so that you don’t end up with mixed clones etc. NIMS also allows you to set age tolerances for merges. Below are the steps for performing a merge.
Capture Form
NIMS allows the user to control which batches are to be merged from NIMS. This means that you would prepare your merge in office, and then print an instructional form for your nursery staff. The merges you prepare are held in temporary batches in a preparation list.
These temporary batches do not affect any of your reports until such time as they are processed.
Once processed the permanent merged batch is created while the batches that are merged into the new batch have a merged transaction created moving all their trays to the new batch.
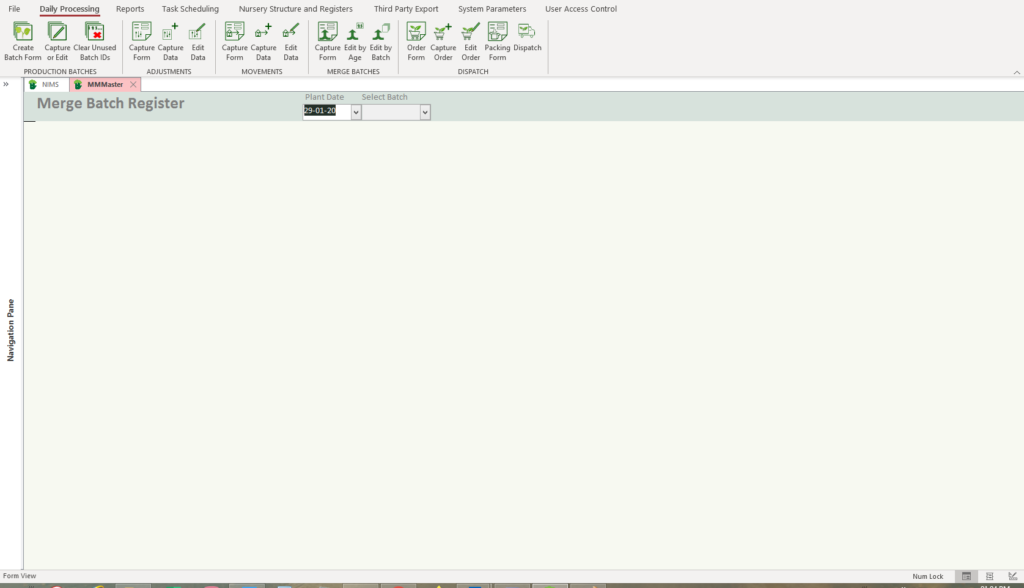
To create a merged batch start by clicking on the capture form. This will open the form below which allows you to create the temporary batches for your merge form:
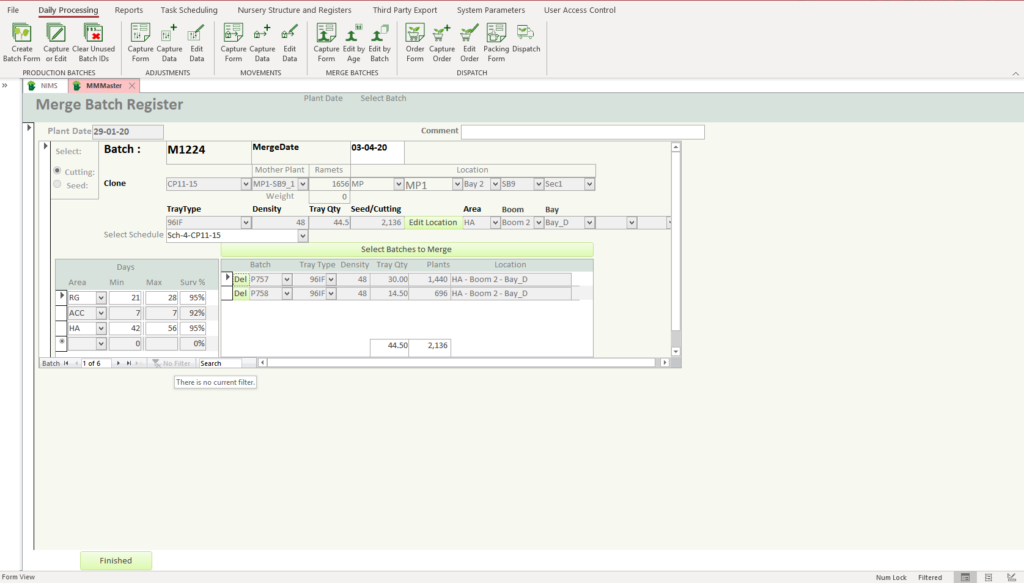
Add your intended merges

The form for setting up a merge is very similar to capturing a normal batch. When creating a merged batch, you do in fact create a new batch from the merged batches rather than replacing any of the existing batches.
| Field | Description | Use |
| Cuttings/Seed | Select the source | Select whether the merged batch is derived from cuttings or seed. This will in turn dictate the clones or seed lots you can select and if clones the mother plants. |
| Plant Date | Select a plant date | This date will be used to filter the batches you can merge in conjunction with your age tolerance that you setup in system parameters. |
| Merge Date | Select the merge date | This is the actual date of the merge and therefor not the age of the plants |
| Clone ID | Select a Clone ID | If you selected cuttings the Clone ID field will be visible. Selecting a clone ID will filter the batches available for merging as having the same Clone ID |
| Mother Plant | Select a Mother Plant | The available Mother Plants will be filtered to match the Clone ID. However available batches will not be filtered my Mother Pant. |
| Tray Type | Select the applicable tray type | NIMS will use this to filter available batches. You cannot merge batches with different tray types or densities |
| Density | Enter tray density | NIMS will use this filter available batches. You cannot merge batches with different tray types or densities |
| Click to select Merged location | Batches can be merged from different locations. You therefor need to specify where the new merged batch will be located. The batch location selection form is the same as previous selection forms. | |
| Select Schedule | Select a schedule | Select the appropriate schedule for daily maintenance of this batch |
 | Edit the projection data if neccessary | The projection data is generated when selecting the Clone Id or Seed lot. You can edit this information in needed. See more |
The information above is for the new merged batch and to a large degree determines which batches are now available for selection to be merged into the new batch.

| Field | Description | Use |
| Batch | Select a batch from the drop down list | The drop down is now populated with batches which can be merged into your new batch. |
| Note that the whole batch will be merged i.e. all the trays. | ||
| Click here to refresh the available batches list | As you are adding, removing, selecting the available batches change. Click here to hard refresh the list. | |
| Click here to refresh the quantities in your new batch | Once you have selected the batches you wish to merge you need to update the quantities on your new batch. You do this by clicking here |
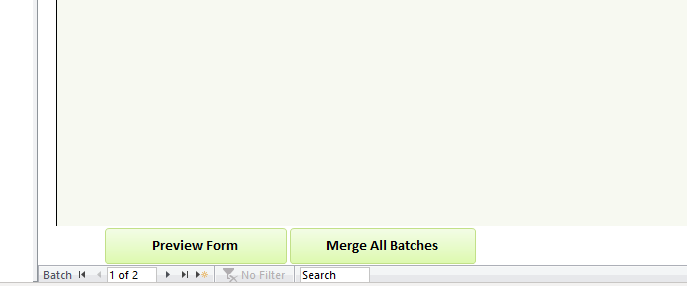
You can also create a number of merge batches at a time. You can scroll through your merge batches using the batch navigation buttons at the bottom of the screen.
Once you have captured all your proposed merge batches, it is time to print the form. The form then goes out into the nursery and records any adjustments that need to be made either prior to the batch being merges into the new batch, or adjustments to the now merged batch that need to be taken into account.
| Field | Description | Use |
| Print the form | This form delat with below is the form which is used to capture the actual merge and any adjustments required. | |
| Click here to merge the visible batch | The form allows you to capture multiple merge batches. Clicking on this button will merge only the current batch. This will process the merge and create the actual merged batch. It will also remove this batch from the preparation list. | |
| Click here to merge all the batches | Clicking on this button will merge all the prepared batches and remove the temporary one from the preparation list |
Navigation Bar

Most NIMS forms have a variation of the following navigation bar. This bar is used to navigate between items which NIMS allows you to add or edit. Below is an explanation of the navigation bar. Please note that if a button is grayed out it is currently not available.
| Field | Description | Use |
| Item Label | This would be the items you are scrolling through – Batches, Adjustments, Movements etc | |
| First Item | Clicking here will take you to the first available item, in this case the first batch | |
| Previous Item | Clicking here would take you to the previous item or batch in this case. You can see this is grayed out so it would mean you are on the first batch and cannot go any further back | |
| No of Items | This shows you that this is batch 1 of 2 available batches on this from | |
| Next Item | Clicking here will take you to the next available item/batch | |
| Last Item | Clicking here will take you to the last available item. Clicking it again will take you to a new item if the form allows you to create new items | |
| New Item | Clicking here will add a new item to the end of the available items. In this case you would be able to create a new batch by clicking here. |
Print Form
MergeCaptureForm| Field | Description | Use |
| Merge No | This is the computer generated merge number | Auto Generated |
| Merge Date | This is the date you selected to perform the merge | Fetched from the data you entered |
| Plant Date | This is the date you selected as the plant date | Fetched from the data you entered |
| Clone/Seed Lot | This is the clone or seed lot | Fetched from the data you entered. The label will change depending on whether it is clone or seed |
| Mother Plant | If a clone then the Mother plant you selected | Fetched from the data you entered |
| Batch | This is the batch you selected to merge into the new batch | Fetched from the data you entered |
| Setting Date | This is fetched from the data of the selected batch | |
| Age Variance | The age of the plant is calculated from setting date | This is the variance in days between the actual plant date and the selected plant date of the new merge batch |
| Location | Fetched from NIMS | This is the current location of the batch to be merged. |
| Tray Type | Fetched from NIMS | Current tray type of batch to be merged |
| Density | Fetched from NIMS | |
| Quantity | Fetched from NIMS | |
| Plants | Fetched from NIMS | |
| CHECK CELLS | The blank columns to the right allow for the data on the form to be verified in the Nursery | Should there be variations, then the correct values can be filled in here. These changes must then be done on the existing batches prior to the merge being processed. Once updated there is the facility on the form to |
| Tray Type | ||
| Density | ||
| Quantity | ||
| Plants | ||
| GRADING CELLS | The grading cells can be used to adjust quantities during the merge | These adjustments are to be entered AFTER processing the merge against the new batch. This will ensure that final quantities in the new batch are correct. |
| Reason | This would be the adjustment type | Enter the adjustment code as per your adjustments |
| Seedlings | Enter the quantity of seedlings | This is the quantity of the adjustment i.e. seedlings lost |
| Reconciliation | This area allows for a final reconciliation | |
| Tray Type | Tray Type of the merged batch | Enter the tray type code |
| Tray Qty | Enter the no of trays | |
| Plants | Enter No of Plants |
This form once completed is returned and used as follows:
- Adjustments to the original batches before merge can be captured
- Once this is done and the totals are verified after refreshing the data, the batches are processed either individually by clicking on the
 button or processed as a batch by clicking on the
  button.
 - Thereafter the adjustments to the new merged batch can be done and a final reconciliation can be done by running a batch report for the new batch.
Editing Merged Batches
  |
Should you wish to edit your merged batch this can be done. You can select which batches you wish to edit by either batch number or by the age of the batch.
Both ways are acceptable and have the same editing process except that selecting a specific age will allow you to edit a series of batches, whereas selecting by batch number will only allow you to edit the selected batch.
By clicking on edit by age the plant date drop down box will be activated while clicking on the Edit by batch will activate the Select batch drop down.
Both will open the form below, but in the case of selecting a batch the navigation bar to scroll through batches will not be available.
In addition as you have already chosen specific batches to merge, you willnot be able to change the Clone ID and Mother Plant, Seed Lot and tray information.
| Field | Description | Use |
| Comment | Comments on Plant Date | Remember this comment field is linked to the plant date rather than the merged batch |
| Merge Date | The date of the merge | This can be edited |
| Schedule | Select a schedule | You can change the schedule for the batch |
| Projection data | The projection data for the batch can be edited. |
| Delete a batch | This allows you to delete a chosen batch form the merge. This will reinstate the deleted batch as a stand alone batch. |

| Add batches to the merge | You can also add more batches to the merge. If you clcik on this button it brings up the following pop up window |
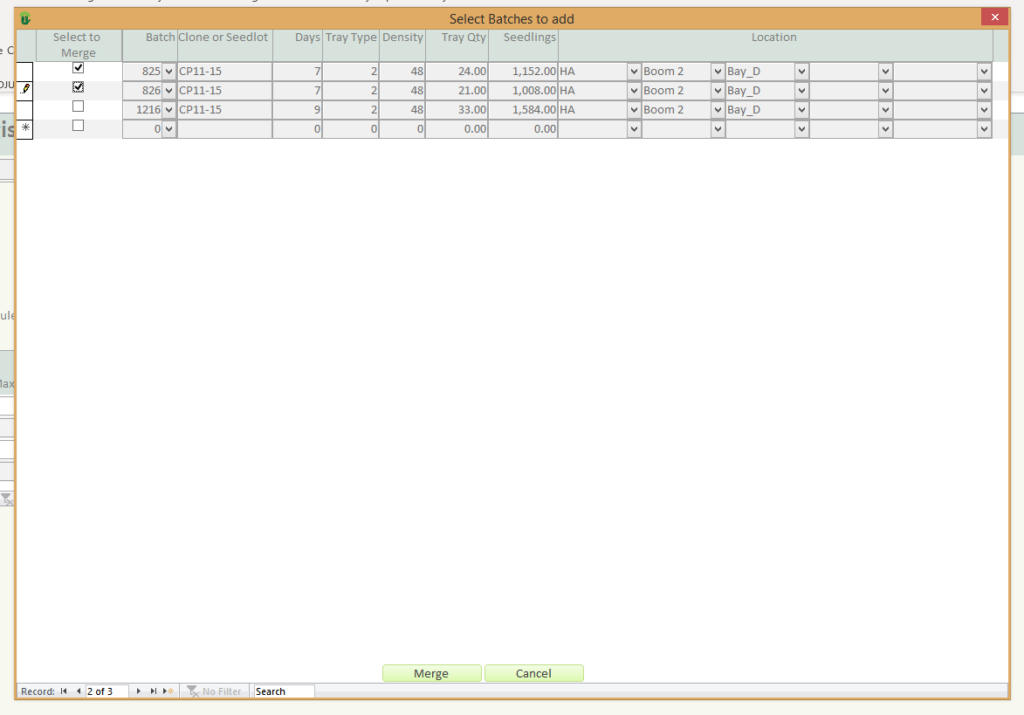
You can select multiple batches to add to the merge.
Deleting a Merge
You can remove an entire merge. If you select the record selector and right click the mouse you can remove the merge by clicking cut
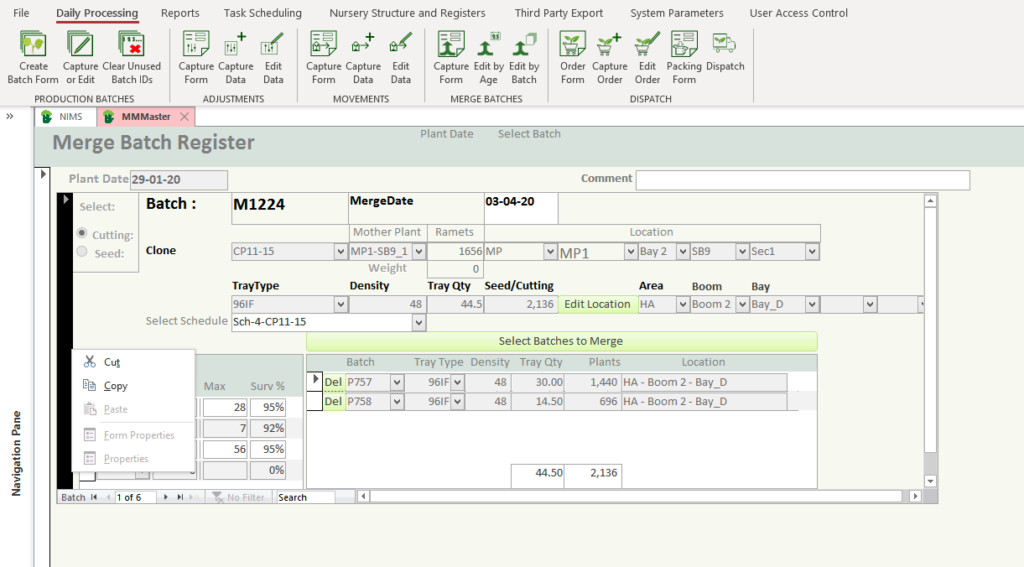
This will delete the merged batch and restore the batches merged into the batch to normal batches.
You cannot delete a plant date or series of merges. You have to delete one at a time.
Merged Batch Ageing
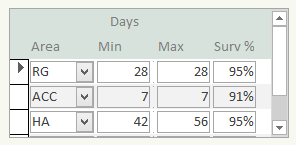
When producing stock reports, NIMS will provide you with information based on your parameter settings on how much of your stock is too young to move/dispatch, ready to move or dispatch or now becoming mature i.e are overdue for move or dispatch.
As a merged batch consists of many different batches who can all have a slight variation in age and entry into an area, it is not possible to determine the exact date of arriving in a specific area of your nursery.
With this in mind, as the merge does occur in a specific area, NIMS will calculate the period which the batch has spent in the area from the merge date.
It is therefor recommended that you merge your batches on entrance to an area and then perform all adjustments on the merged batch. This will ensure that the ageing produces accurate information for your merged batches.
Note that the actual age of the plants are not relevant as you would only move them when ready. This means that if your plants are growing slower than expected you may move them into an area later than expected, but would still want to monitor how long they are in the new area as per your projection settings. This is why NIMS opted for days in a specific area rather than working on the overall age of the plants.